A brief tour of OTB Applications
OTB ships with more than 90 ready to use applications for remote sensing tasks. They usually expose existing processing functions from the underlying C++ library, or integrate them into high level pipelines. OTB applications allow the user to:
- Combine two or more functions from the Orfeo ToolBox,
- Provide a high level interface to handle: input and output data, definition of parameters and communication with the user.
OTB applications can be launched in different ways, and accessed from different entry points. While the framework can be extended, the Orfeo ToolBox ships with the following:
- A command-line launcher, to call applications from the terminal,
- A graphical launcher, with an auto-generated QT interface, providing ergonomic parameters setting, display of documentation, and progress reporting,
- A SWIG interface, which means that any application can be loaded, set-up and executed into a high-level language such as Python or Java for instance.
- QGIS plugin built on top of the SWIG/Python interface is available with seamless integration within QGIS.
The complete list of applications is described in the Chapter Applications Reference Documentation.
All standard applications share the same implementation and automatically expose
generated interfaces.
However they are accessed in a slightly different way: the command-line interface is prefixed by otbcli_, while the Qt interface is prefixed by
otbgui_. For cwinstance, calling otbcli_Convert will launch the
command-line interface of the Convert application, while
otbgui_Convert will launch the GUI.
Command-line launcher
The command-line application launcher loads an application
plugin, allows for its parameters to be set, and can then be executed from the command line.
Launching the otbApplicationLauncherCommandLine without any arguments provided,
results in the following help to be displayed:
$ otbApplicationLauncherCommandLine
Usage: ./otbApplicationLauncherCommandLine module_name [MODULEPATH] [arguments]
The module_name parameter corresponds to the application name. The
[MODULEPATH] argument is optional and allows the path to the shared library
(or plugin) corresponding to the module_name to be passed to the launcher.
It is also possible to set this path with the environment variable
OTB_APPLICATION_PATH, making the [MODULEPATH] optional. This
variable is checked by default when no [MODULEPATH] argument is
given. When using multiple paths in OTB_APPLICATION_PATH, one must
ensure that the standard path separator of the target system is used, which
is : on Unix and ; on Windows.
An error in the application name (i.e. in parameter module_name)
will make the otbApplicationLauncherCommandLine list the name of
all applications found in the available path (either [MODULEPATH]
and/or OTB_APPLICATION_PATH).
To ease the use of the applications, and to avoid extensive
environment customizations; ready-to-use scripts are provided by the OTB
installation to launch each application. They take care of adding the
standard application installation path to the OTB_APPLICATION_PATH
environment variable.
These scripts are named otbcli_<ApplicationName> and do not need any
path settings. For example, you can start the Orthorectification
application with the script called otbcli_Orthorectification.
Launching an application without parameters, or with incomplete parameters, will cause the launcher to display a summary of the parameters. This summary will display the minimum set of parameters that are required to execute the application. Here is an example based on the OrthoRectification application:
$ otbcli_OrthoRectification

ERROR: Waiting for at least one parameter...

====================== HELP CONTEXT ======================
NAME: OrthoRectification
DESCRIPTION: This application allows to ortho-rectify optical images from supported sensors.

EXAMPLE OF USE:
otbcli_OrthoRectification -io.in QB_TOULOUSE_MUL_Extract_500_500.tif -io.out QB_Toulouse_ortho.tif

DOCUMENTATION: http://www.orfeo-toolbox.org/Applications/OrthoRectification.html
======================= PARAMETERS =======================
        -progress                        <boolean>        Report progress
MISSING -io.in                           <string>         Input Image
MISSING -io.out                          <string> [pixel] Output Image  [pixel=uint8/int8/uint16/int16/uint32/int32/float/double]
        -map                             <string>         Output Map Projection [utm/lambert2/lambert93/transmercator/wgs/epsg]
MISSING -map.utm.zone                    <int32>          Zone number
        -map.utm.northhem                <boolean>        Northern Hemisphere
        -map.transmercator.falseeasting  <float>          False easting
        -map.transmercator.falsenorthing <float>          False northing
        -map.transmercator.scale         <float>          Scale factor
        -map.epsg.code                   <int32>          EPSG Code
        -outputs.mode                    <string>         Parameters estimation modes [auto/autosize/autospacing]
MISSING -outputs.ulx                     <float>          Upper Left X
MISSING -outputs.uly                     <float>          Upper Left Y
MISSING -outputs.sizex                   <int32>          Size X
MISSING -outputs.sizey                   <int32>          Size Y
MISSING -outputs.spacingx                <float>          Pixel Size X
MISSING -outputs.spacingy                <float>          Pixel Size Y
        -outputs.isotropic               <boolean>        Force isotropic spacing by default
        -elev.dem                        <string>         DEM directory
        -elev.geoid                      <string>         Geoid File
        -elev.default                    <float>          Average Elevation
        -interpolator                    <string>         Interpolation [nn/linear/bco]
        -interpolator.bco.radius         <int32>          Radius for bicubic interpolation
        -opt.rpc                         <int32>          RPC modeling (points per axis)
        -opt.ram                         <int32>          Available memory for processing (in MB)
        -opt.gridspacing                 <float>          Resampling grid spacing
For a detailed description of the application behaviour and parameters,
please check the application reference documentation presented
in chapter Applications Reference Documentation or follow the DOCUMENTATION
hyperlink provided in the output of otbApplicationLauncherCommandLine.
Parameters are passed to the application using the parameter key (which
might include one or several . character), prefixed by a -.
Command-line examples are provided in the chapter Applications Reference Documentation.
Graphical launcher
The graphical interface for the applications provides a useful interactive user interface to set the parameters, choose files, and monitor the execution progress.
This launcher needs the same two arguments as the command line launcher:
$ otbApplicationLauncherQt module_name [MODULEPATH]
The application paths can be set with the OTB_APPLICATION_PATH
environment variable, as for the command line launcher. Also, as for the
command-line application, a more simple script is generated and
installed by OTB to ease the configuration of the module path: to
launch the graphical user interface, one will start the
otbgui_Rescale script.
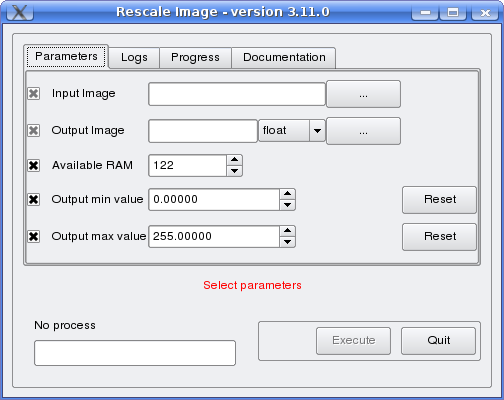
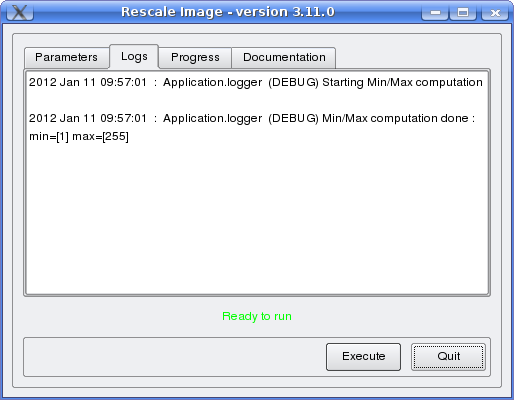
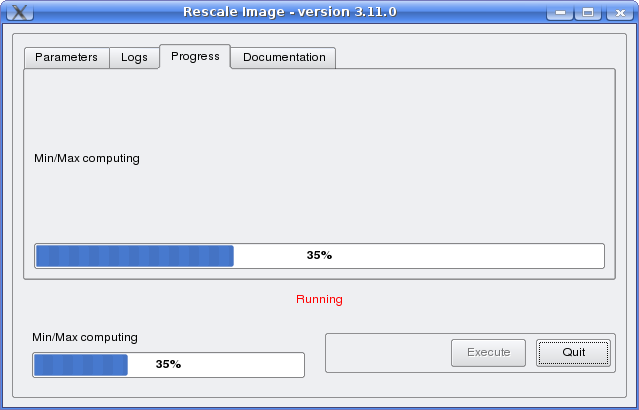
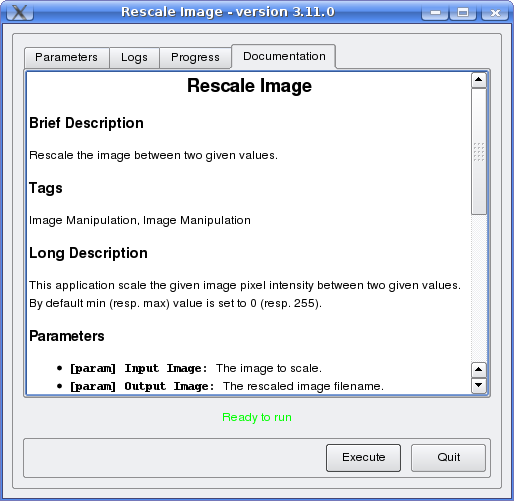
The resulting graphical application displays a window with several tabs:
- Parameters is where you set the parameters and execute the application.
- Logs is where you see the output given by the application during its execution.
- Progress is where you see a progress bar of the execution (not available for all applications).
- Documentation is where you find a summary of the application documentation.
In this interface, every optional parameter has a check box that you have to tick if you want to set a value and use this parameter. The mandatory parameters cannot be unchecked.
The interface of the application is shown here as an example.
Python interface
The applications can also be accessed from Python, through a module
named otbApplication. However, there are technical requirements to use it.
If you use OTB through standalone packages, you should use the supplied
environment script otbenv to properly setup variables such as
PYTHONPATH and OTB_APPLICATION_PATH (on Unix systems, don’t forget to
source the script). In other cases, you should set these variables depending on
your configuration.
On Unix systems, it is typically available in the /usr/lib/otb/python
directory. Depending on how you installed OTB, you may need to configure the
environment variable PYTHONPATH to include this directory so that the module
becomes available from Python.
On Windows, you can install the otb-python package, and the module
will be automatically available from an OSGeo4W shell.
As for the command line and GUI launchers, the path to the application
modules needs to be properly set with the OTB_APPLICATION_PATH
environment variable. The standard location on Unix systems is
/usr/lib/otb/applications. On Windows, the applications are
available in the otb-bin OSGeo4W package, and the environment is
configured automatically so OTB_APPLICATION_PATH doesn’t need to be modified
OTB_APPLICATION_PATH.
Once your environment is set, you can use OTB applications from Python, just like this small example:
#  Example on the use of the Smoothing application

# The python module providing access to OTB applications is otbApplication
import otbApplication as otb

# Let's create the application with codename "Smoothing"
app = otb.Registry.CreateApplication("Smoothing")

# We set its parameters
app.SetParameterString("in", "my_input_image.tif")
app.SetParameterString("type", "mean")
app.SetParameterString("out", "my_output_image.tif")

# This will execute the application and save the output file
app.ExecuteAndWriteOutput()
For more information about this Python interface, check the recipe section.
Load and save parameters to XML
Since OTB 3.20, OTB applications parameters can be export/import to/from an XML file using inxml/outxml parameters. Those parameters are available in all applications.
An example is worth a thousand words
otbcli_BandMath -il input_image_1 input_image_2
                -exp "abs(im1b1 - im2b1)"
                -out output_image
                -outxml saved_applications_parameters.xml
Then, you can run the applications with the same parameters using the output XML file previously saved. For this, you have to use the inxml parameter:
otbcli_BandMath -inxml saved_applications_parameters.xml
Note that you can also add additional parameters to the command line at the same time
otbcli_BandMath -inxml saved_applications_parameters.xml
                -exp "(im1b1 - im2b1)"
In this case it will use as mathematical expression “(im1b1 - im2b1)” instead of “abs(im1b1 - im2b1)”.
Finally, you can also launch applications directly from the command-line launcher executable using the inxml parameter without having to declare the application name. Use in this case:
otbApplicationLauncherCommandLine -inxml saved_applications_parameters.xml
It will retrieve the application name and related parameters from the input XML file and launch in this case the BandMath applications.
Parallel execution with MPI
Provided that Orfeo ToolBox has been built with MPI and SPTW modules
activated, it is possible to use MPI for massive parallel computation
and writing of an output image. A simple call to mpirun before the
command-line activates this behaviour, with the following logic. MPI
writing is only triggered if:
- OTB is built with MPI and SPTW,
- The number of MPI processes is greater than 1,
- The output filename is
.tifor.vrt
In this case, the output image will be divided into several tiles
according to the number of MPI processes specified to the mpirun
command, and all tiles will be computed in parallel.
If the output filename extension is .tif, tiles will be written in
parallel to a single Tiff file using SPTW (Simple Parallel Tiff Writer).
If the output filename extension is .vrt, each tile will be
written to a separate Tiff file, and a global VRT file will be written.
Here is an example of MPI call on a cluster:
$ mpirun -np $nb_procs --hostfile $PBS_NODEFILE  \
  otbcli_BundleToPerfectSensor \
  -inp $ROOT/IMG_PHR1A_P_001/IMG_PHR1A_P_201605260427149_ORT_1792732101-001_R1C1.JP2 \
  -inxs $ROOT/IMG_PHR1A_MS_002/IMG_PHR1A_MS_201605260427149_ORT_1792732101-002_R1C1.JP2 \
  -out $ROOT/pxs.tif uint16 -ram 1024

  ------------ JOB INFO 1043196.tu-adm01 -------------

  JOBID           : 1043196.tu-adm01
  USER            : michelj
  GROUP           : ctsiap
  JOB NAME        : OTB_mpi
  SESSION         : 631249
  RES REQSTED     : mem=1575000mb,ncpus=560,place=free,walltime=04:00:00
  RES USED        : cpupercent=1553,cput=00:56:12,mem=4784872kb,ncpus=560,vmem=18558416kb,
  walltime=00:04:35
  BILLING         : 42:46:40 (ncpus x walltime)
  QUEUE           : t72h
  ACCOUNT         : null
  JOB EXIT CODE   : 0

------------ END JOB INFO 1043196.tu-adm01 ---------
One can see that the registration and pan-sharpening of the panchromatic and multi-spectral bands of a Pleiades image has been split between 560 CPUs and only took 56 seconds to complete.
Note that this MPI parallel invocation of applications is only available for command-line calls to OTB applications, and only for images output parameters.