Common Use Cases
You are now ready to use OTB. In this page we describe simple use cases that you may encounter in your OTB usage.
Use Command Line Interface
This use case shows how to orthorectify a Pleiades Image and perform an Edge extraction on a specific ROI.
# First do a BundleToPerfectSensor to have one colored image in full resolution
otbcli_BundleToPerfectSensor -inp /Path/To/PleiadesProduct/IMG_PHR1B_P_201308051042194_SEN_690908101-001_R1C1.JP2 -inxs /Path/To/PleiadesProduct/IMG_PHR1B_MS_201308051042194_SEN_690908101-004_R1C1.JP2 -out /Path/To/Output/img_pxs.tif -method "bayes"
# let's orthorectify this image, the use of dem and geoid is recommended to avoid precision problems, specially on mountainous areas
otbcli_OrthoRectification -io.in /Path/To/Output/img_pxs.tif -io.out /Path/To/Output/pxs_ortho.tif -elev.dem /PathToDEMDirectory -elev.geoid /PathToGeoidFile
# get the Region we want to extract the edges from
otbcli_ExtractROI -in /Path/To/Output/pxs_ortho.tif -out /Path/to/Output/pxs_extract.tif -startx 50 -starty 50 -sizex 500 -sizey 500
# Extract the edges from that cropped image
otbcli_EdgeExtraction -in /Path/to/Output/pxs_extract.tif -out /Path/To/Output/pxs_extract_edges.tif
Use OTB in QGIS
This use case covers the QGIS configuration and an example of an ExtractROI
To configure the QGIS plugin, follow the QGIS interface
Note: in a near future this page will be moved as the OTB provider for QGIS will be integrated and maintained in the OTB project
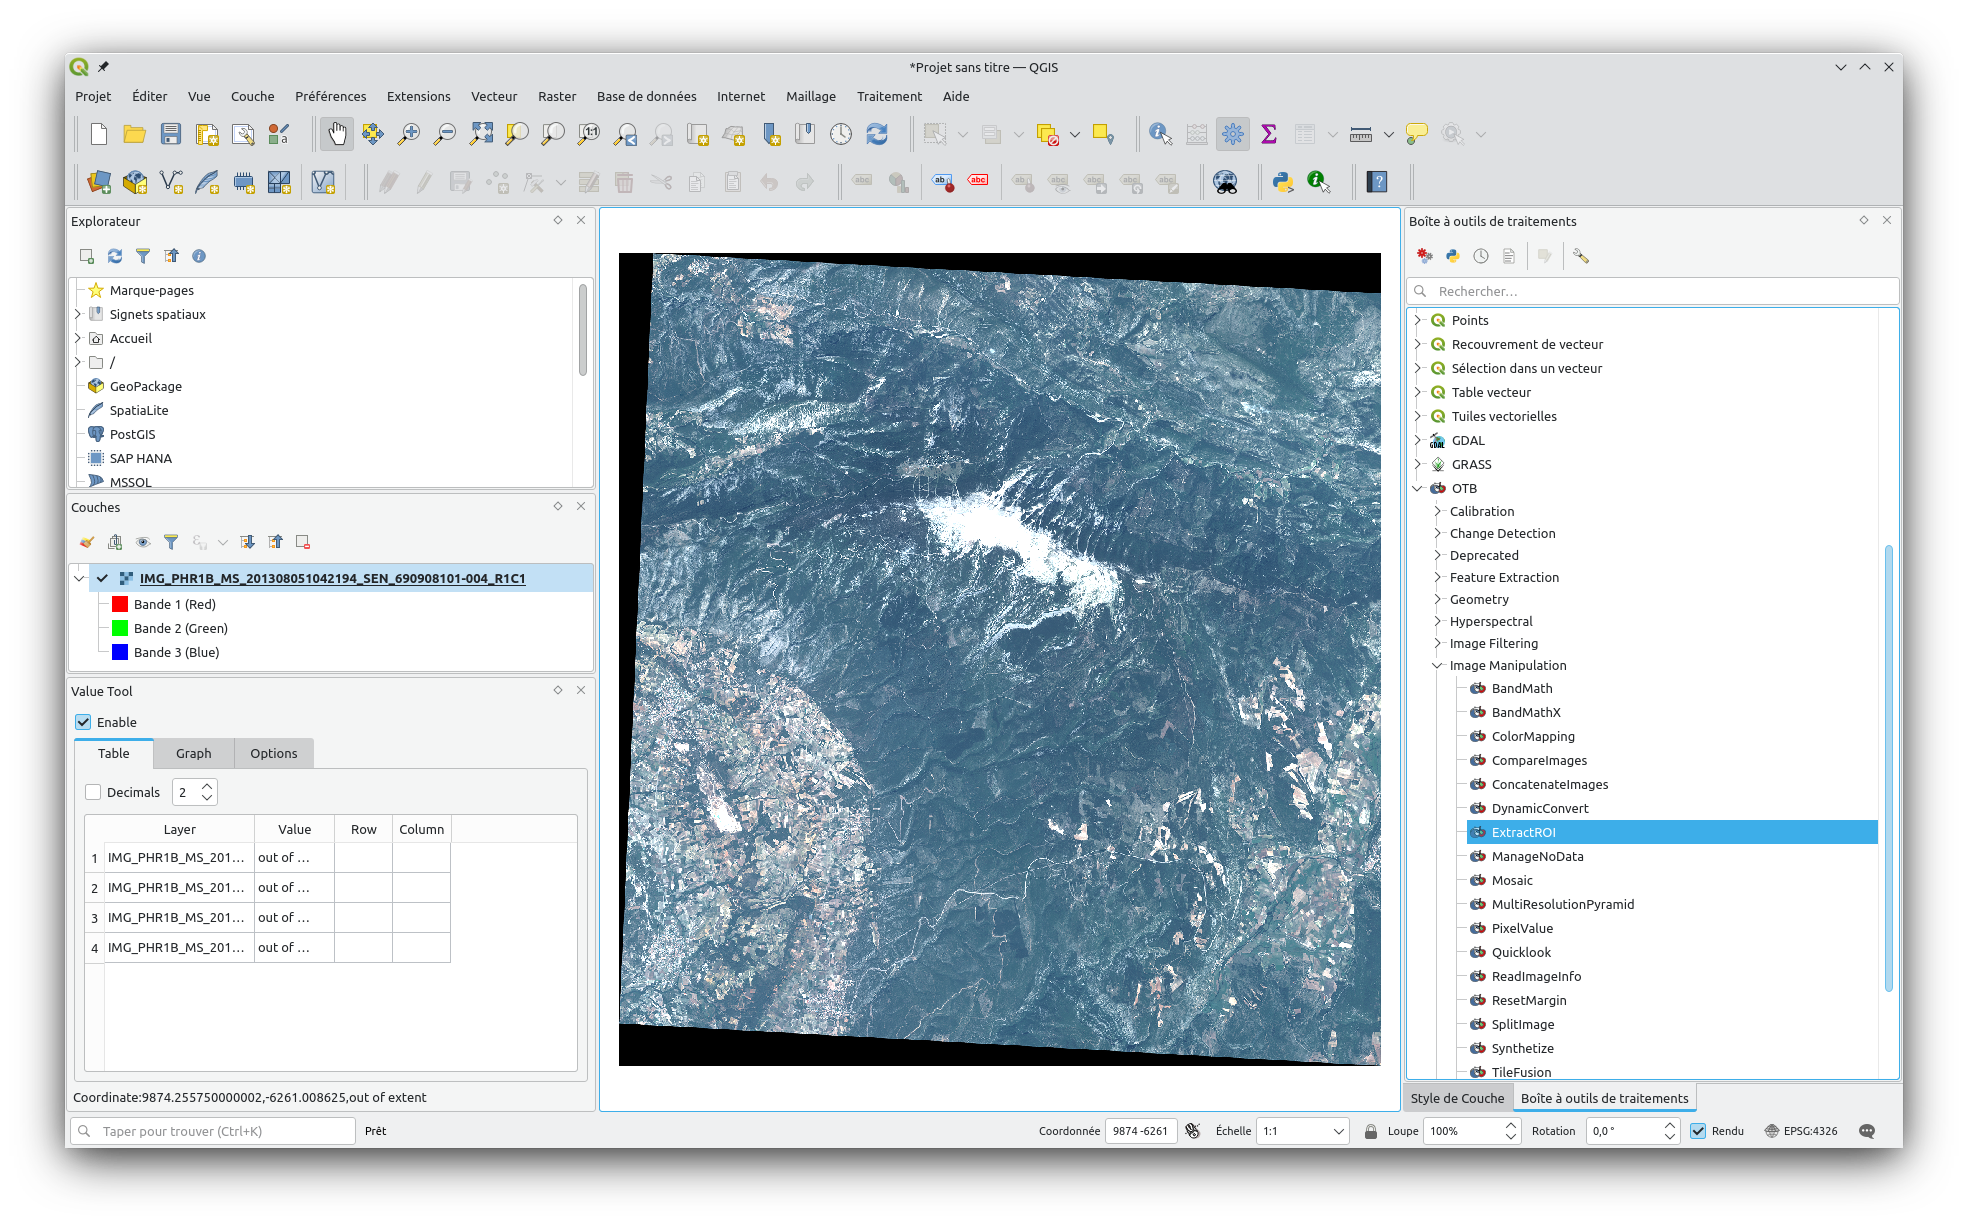
Open your image and select the extractROI application
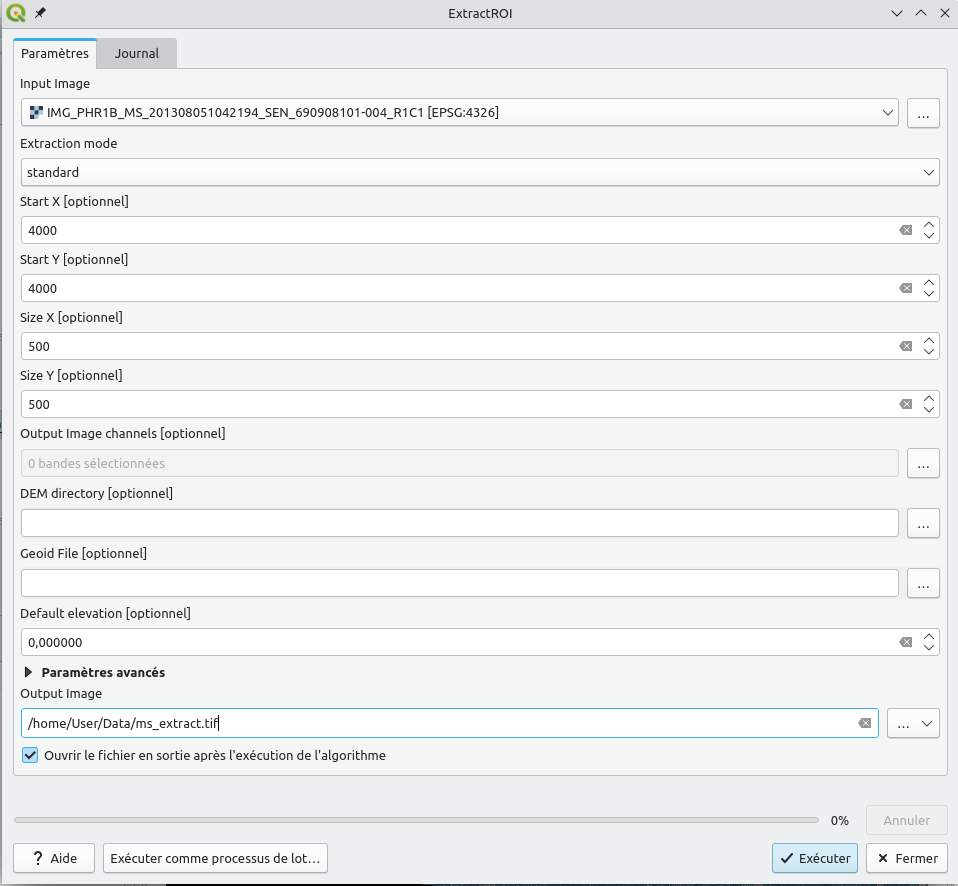
Set the parameters for a simple extract of a 500x500 pixels zone, starting at 4000,4000
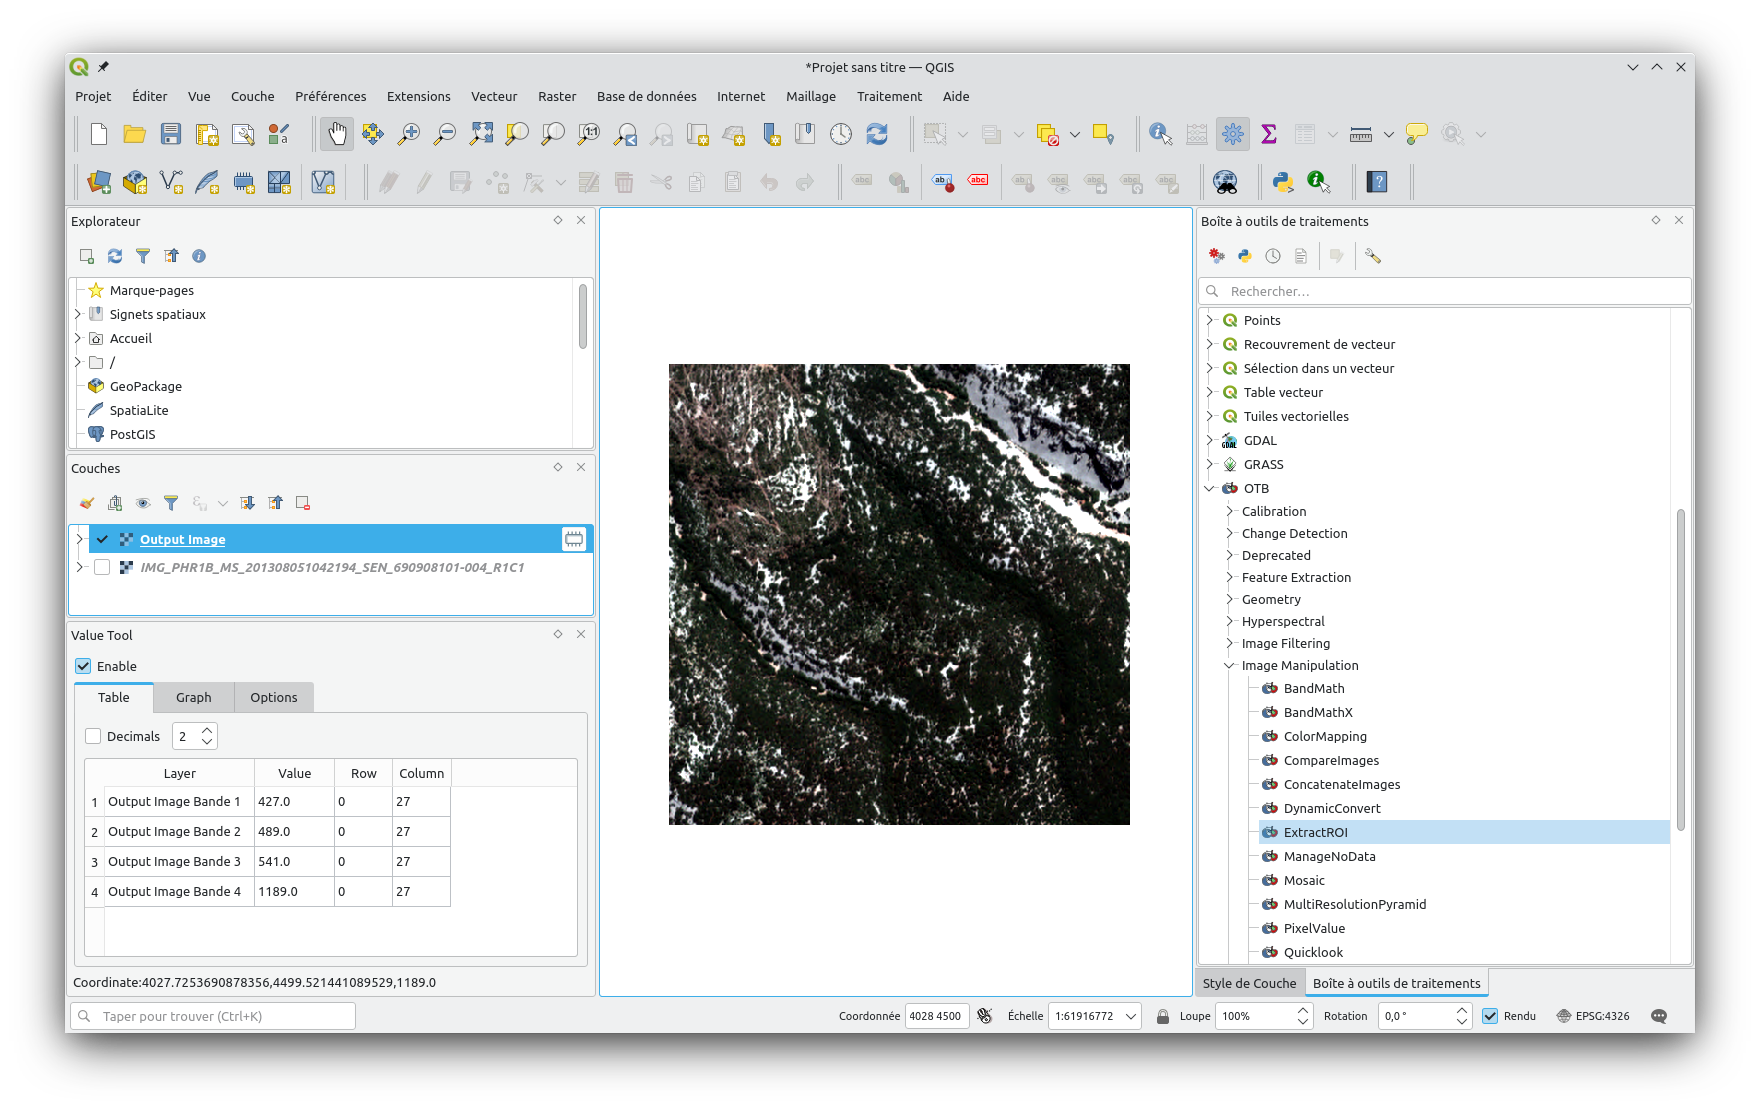
Display the result
Use Python API
This use case is based on a raw Pleiades product that you want to orthorectify and extract an ROI from. That product is typically composed of a Panchromatic image (high resolution black and white image) and an XS image (lower resolution with colors) requiring a BundleToPerfectSensor step, in order to have only one colored image to orthorectify.
#!/usr/bin/python
import otbApplication as otb
import argparse
import sys
import glob
import os


def main():
    """
    """
    parser = argparse.ArgumentParser()
    parser.add_argument("inp", help="Input image (Panchro)")
    parser.add_argument("inxs", help="Input image (Multispectral)")
    parser.add_argument("roi", help="Region of interest (georeferenced vector data - shapefile, sqlite, etc.")
    parser.add_argument("out", help="Pansharpened georeferenced image cropped on input ROI")
    parser.add_argument("-geoid", default="none", required=False, action="store", dest="geoid", help="Geoid file (EGM 96) for orthorectification")
    parser.add_argument("-dem", default="none", required=False, action="store", dest="dem", help="DEM directory for orthorectification")

    args = parser.parse_args()

    print(f"{args=}")


    appPXS = otb.Registry.CreateApplication("BundleToPerfectSensor")
    params_PXS = {"inp":args.inp, "inxs":args.inxs, "out":"in_mem_PXS.tif", "method":"bayes"}
    appPXS.SetParameters(params_PXS)
    # No need to run Execute() because we'll connect output to next application with ConnectImage method

    appOrtho = otb.Registry.CreateApplication("OrthoRectification")
    params_Ortho = {"io.out":"in_mem_Ortho.tif"}
    if args.geoid != "none" and args.dem != "none":
        params_Ortho.update({"elev.geoid":args.geoid, "elev.dem":args.dem})
    # Use BundleToPerfectSensor output as OrthoRectification input
    appOrtho.ConnectImage("io.in", appPXS, "out")

    appROI = otb.Registry.CreateApplication("ExtractROI")
    params_ROI = {"out":args.out,"mode":"fit","mode.fit.vect":args.roi}
    appROI.SetParameters(params_ROI)
    # Plug the last step of our pipeline
    appROI.ConnectImage("in", appOrtho, "io.out")

    # Resolve the pipeline and run !!
    # Only pixels within the ROI will be pansharpened and orthorectified !!
    appROI.ExecuteAndWriteOutput()

if __name__ == "__main__":
    main()